tldr;
A proper setup of the audio on your computer will make for great recording quality. Your listeners will hear nice crisp audio, and there won't be any fans or anything in the background. The great thing is you don't need to spend a fortune on equipment to get this quality. Using Audio Hijack and Loopback from Rogue Amoeba will help improve the quality of your sound output. By the end of this post, you should be able to have everything set up. I am by no means an expert, and will continue to play with these programs and settings, but what I have set up now seems to be working great.
Loopback
Loopback by Rogue Amoeba is a great application to manage audio on your computer. It allows you to capture audio in one (or more) applications and route it to a new virtual input device. This allows you to take audio from application A and pass it to audio processing software B. It's perfect for our situation here. In our case, we're just going to create a virtual device that can be used as an output device from Audio Hijack.
Creating a Virtual Input with Loopback
Let's create the virtual device we'll use for Camtasia. Open Loopback and create a new virtual device. At the top of the screen you can give it a name so that it's easy to identify later on. The screen will look like this after you do that:
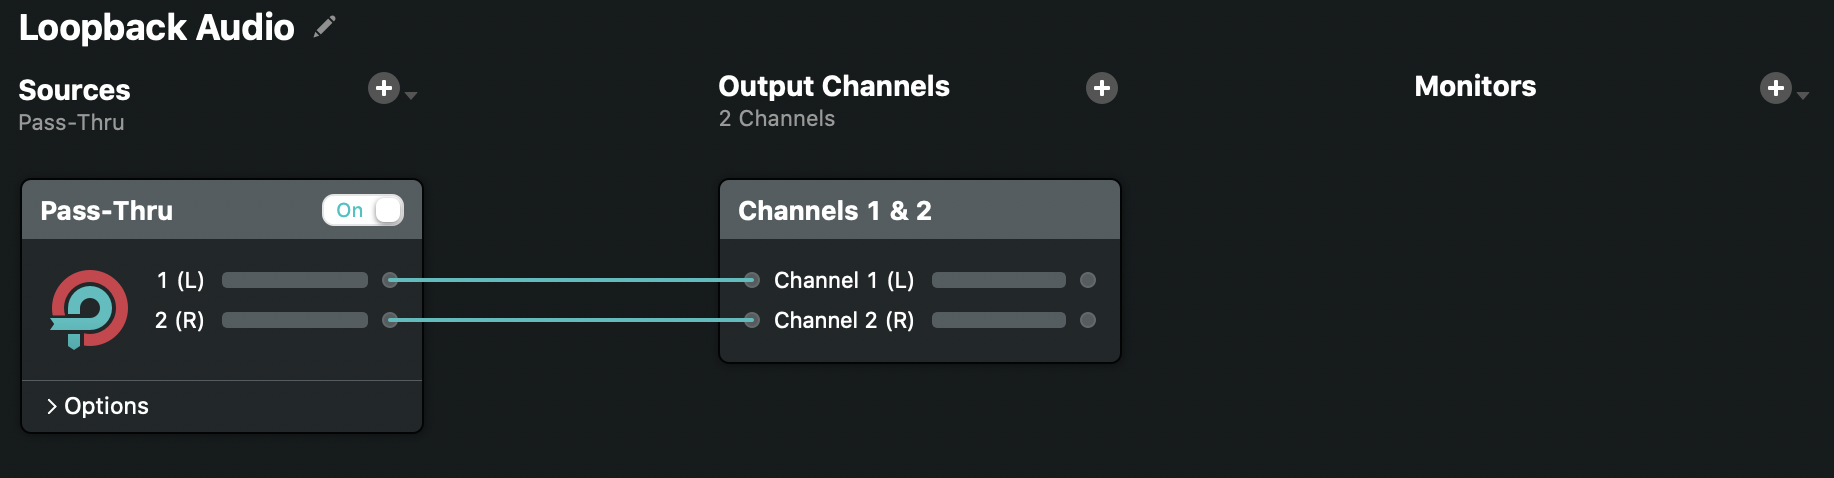
And that's it! You've created your virtual device. Simple, huh? We'll use that in a minute after configuring Audio Hijack.
Audio Hijack
I've been recording courses for Thinkster.io for about a year now, and each time I'd record I'd have to make sure my office was dead silent. If a car drove by outside, that might get picked up. If someone walked across the floor upstairs, that would probably get picked up. If the external hard drive started running, that was definitely getting picked up. So it was really tough to get everything just right. Most of the time I'd get it close to right, but not always. The only problem was a small hum, and it wasn't terrible but it did bug me (partly because I'm a perfectionist).
So I started looking for ways to get rid of the hum, and was led to Audacity. It's a great tool, but it wasn't very user friendly. I found a couple tutorials on noise removal, but they didn't really seem to remove that much noise. So I kept on searching, and found some suggestions of using a noise gate program. I looked around and found a few options, but the one that seemed most up to date and current was Audio Hijack by Rogue Amoeba.
Essentially, Audio Hijack does just that: it hijacks the audio on your computer and gives you the option to manipulate it. You can choose different inputs and sources, and select the outputs as well for the audio. You can even output it to a recorded file if you'd like. So this seemed like the perfect application for my needs, and I dug in to get it set up. So here are the steps that I followed.
Creating a Session
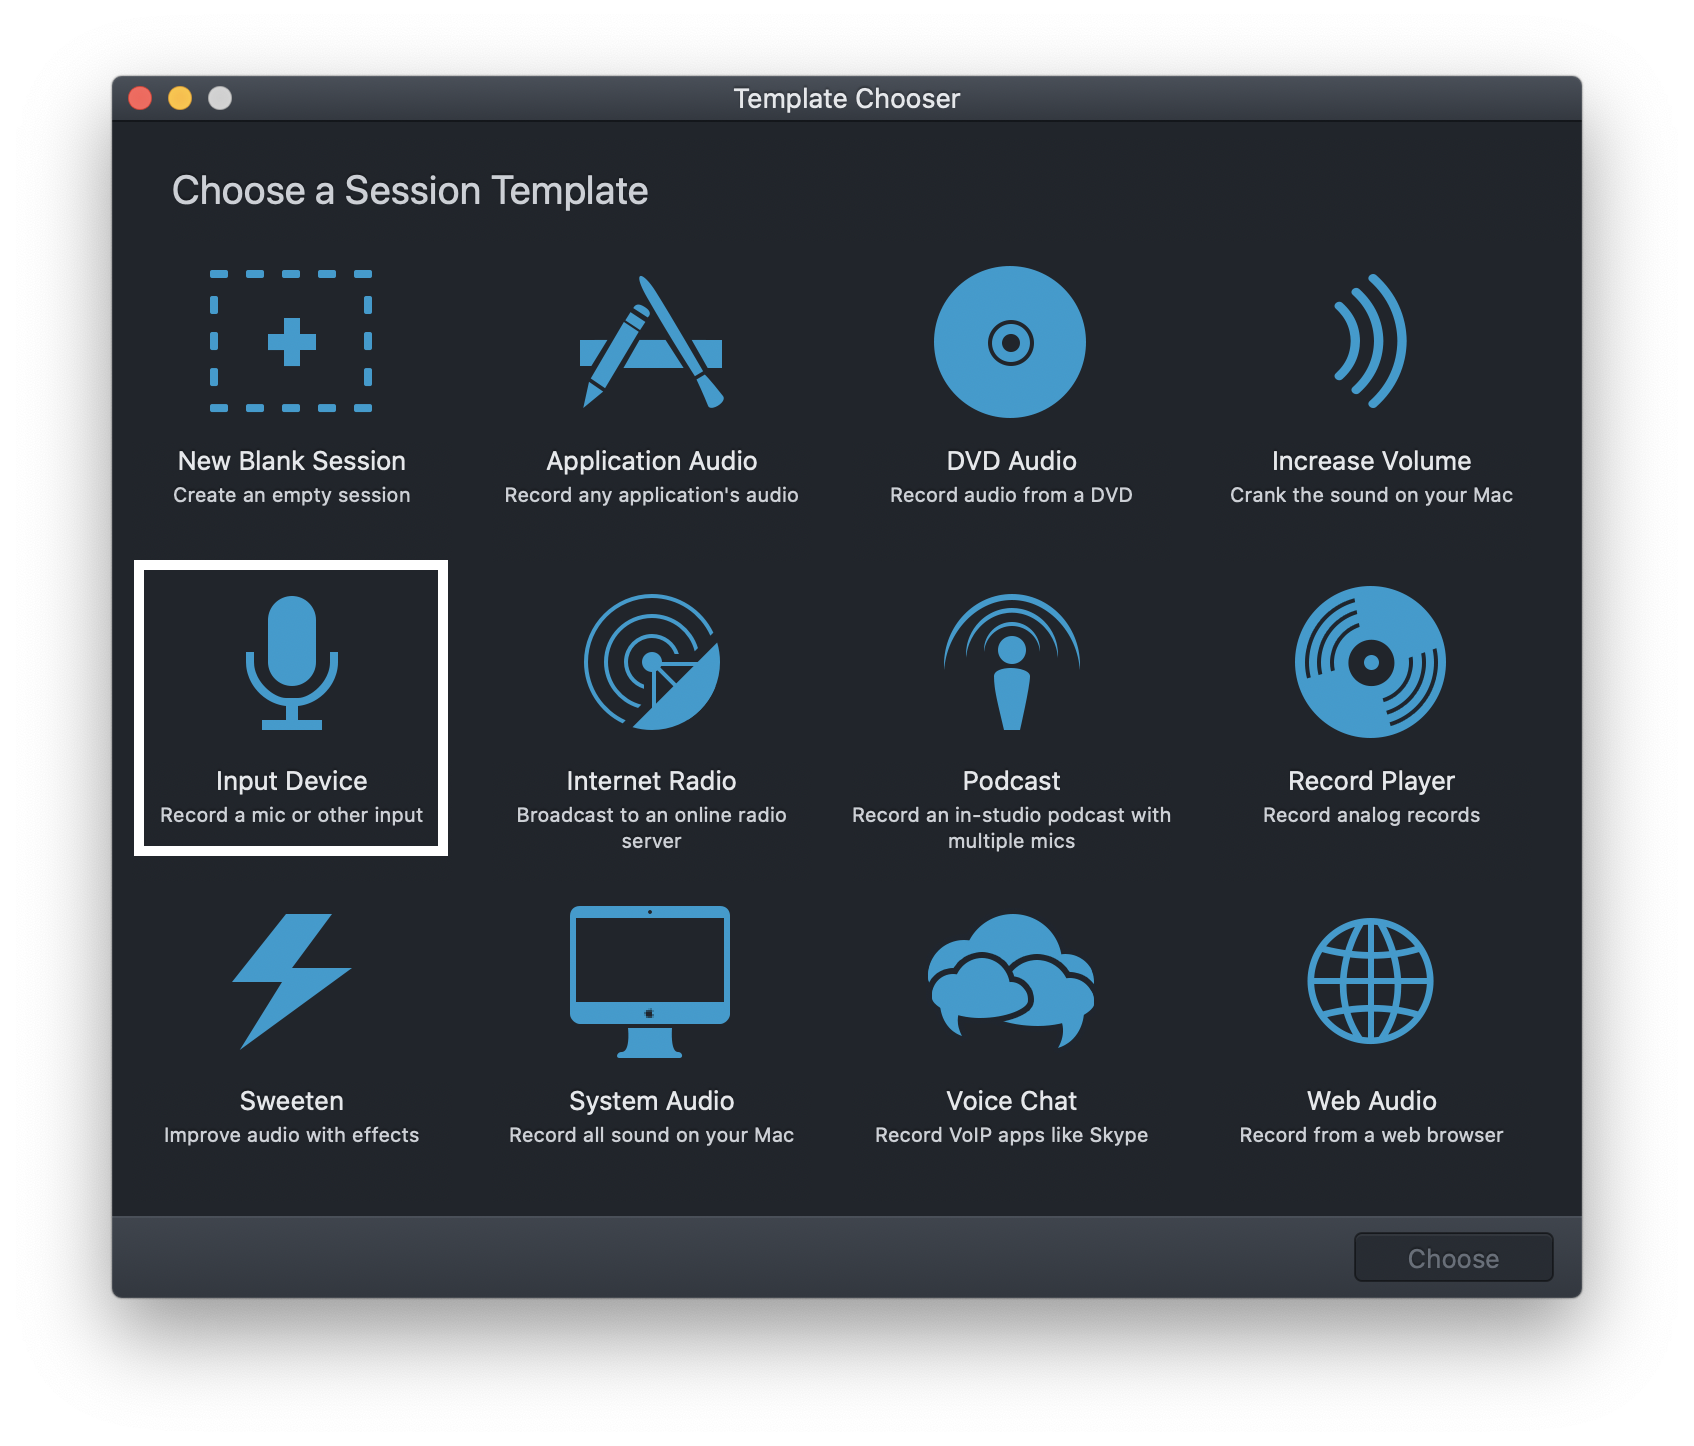
Start by opening up the application and clicking on "New Session". This will give you a screen of options for the session you'll be creating. You can choose a template or create your own from scratch. I selected the "Input Device" template.
This gives you the following starting point for your session:
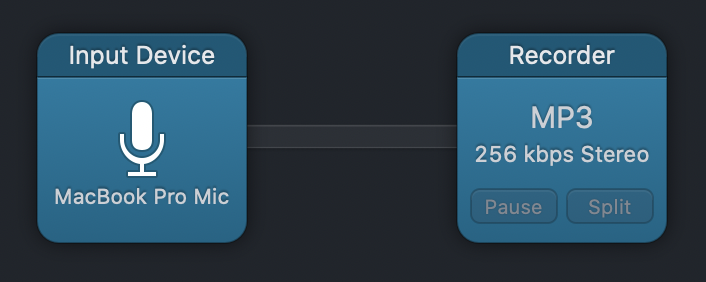
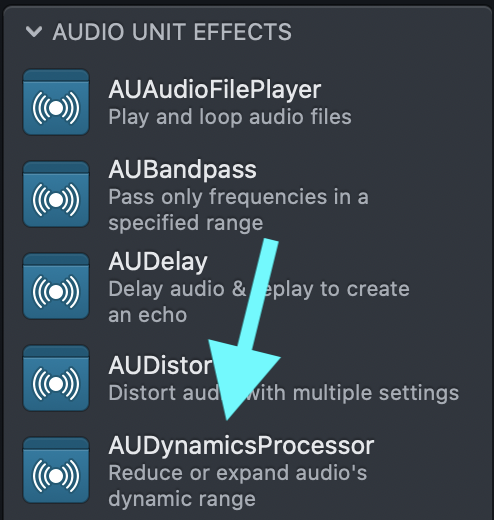
It takes the sound from an input device and outputs it to an mp3 recording. Now just this alone will not get rid of background noise for you when recording. We now need to add an effect to the sound. The one we want to use is called "AUDynamics Processor". You can get that from the menu on the right hand side of the session configuration window. Open the "Audio Unit Effects" dropdown and find "AUDynamics Processor" from the list and drag it until it sits between the input and the mp3 output.
With that effect in there, we are ready to manipulate the audio. But before we do that, I want to change the output of the processed audio. I create my courses for Thinkster in Camtasia, so what I really wanted was to have this manipulated audio fed right in to that application. I didn't want to save the audio to an mp3 and then import the mp3 into Camtasia. To do this, we'll use our virtual device from Loopback. Add an Output Device after the AUDynamics Processor. Click on the box and select the Loopback Device that you created a moment ago from the dropdown list. Your session should now look like this:
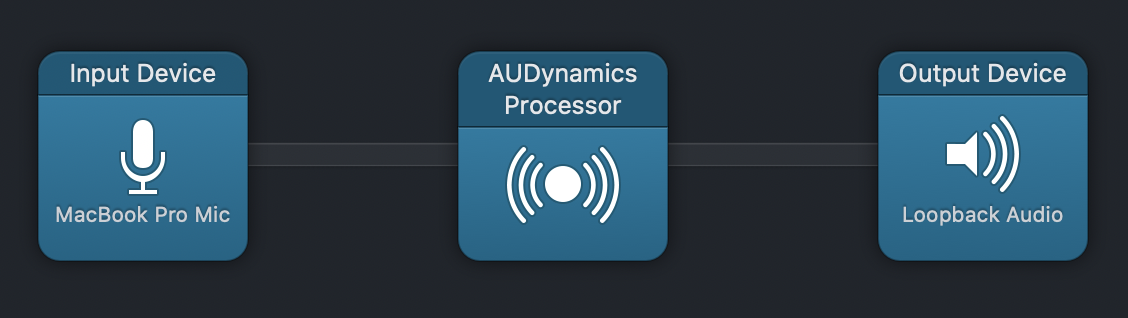
This will mean that Audio Hijack takes the audio input, blocks background noise, and outputs it to our virtual device. But we aren't yet blocking out background noise. Let's do that now. To do that, click on the AUDynamics Processor block. A little box should pop up with a graph in it:
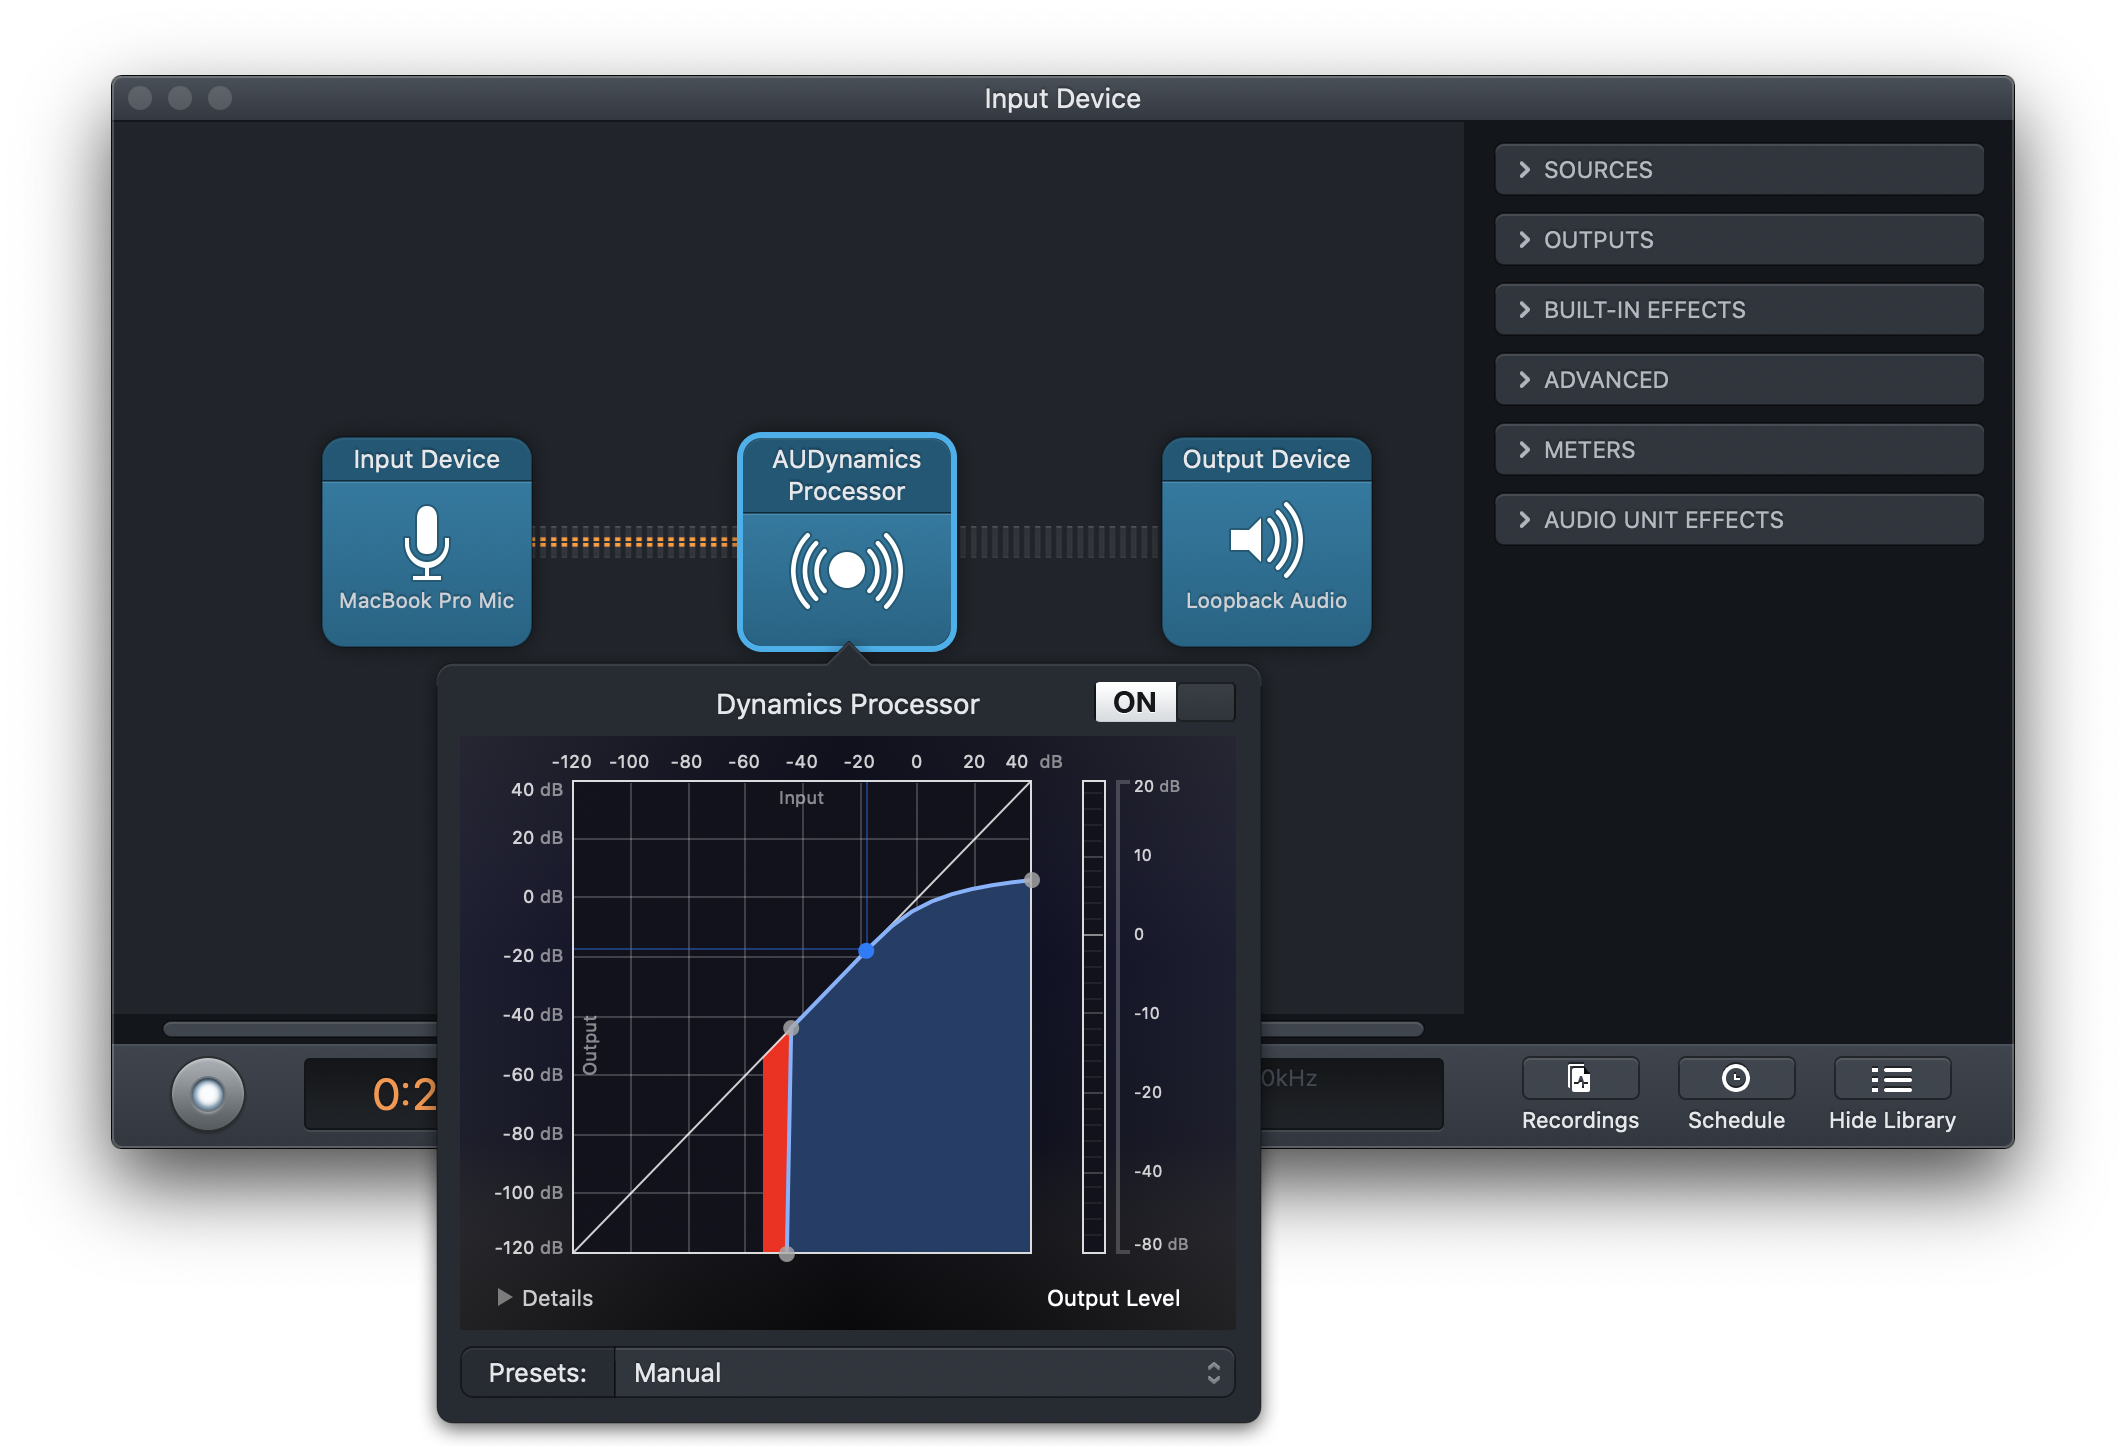
On the chart are some dots that you can slide along the different axes. As you do that, you'll be changing what sounds will be allowed past this noise gate we've created. There are 4 dots that you can move. The two I moved are the ones furthest to the left; one was on the diagonal line and one along the bottom line of the chart. As I manipulated these two dots, certain sounds that the microphone was picking up started turning red. you can see the red in the screenshot above. The red means that the sounds Audio Hijack detected were being ignored. Anything above that line is picked up by the microphone. You'll have to play with this a little bit to make sure that for your room and mic and how loud your voice is you get all the sound you're expecting to get.
That's all you need to do in Audio Hijack! You're now good to go!
Using the Virtual Device
Now that you have everything set up, you are ready to use the virtual device. In the session that you created in Audio Hijack, click the button that looks like a record symbol in the bottom left. That makes the session active and start picking up sounds. Then go to the application you want to use. For me it was Camtasia, but you could use this same setup with anything, like Zoom You can for example. You can even set your system audio input to the virtual device that you created. With Audio Hijack running and having selected your Loopback device as the input, your audio will be filtered of all background noise. 😃
Conclusion
Hopefully this was helpful for you! This is just one way to do this, and I even changed how I was doing this while writing the blog post! So there are probably other ways to do this and they may even be better. If you have any suggestions, please reach out and let me know how I can improve on this setup.